Creating New Spark SQL Connections
The following steps demonstrate how to create new Spark SQL data connections.
On the main navigation bar, click Data.
The Data view appears, open on the Datasets tab.
In the side bar, click New Connection.
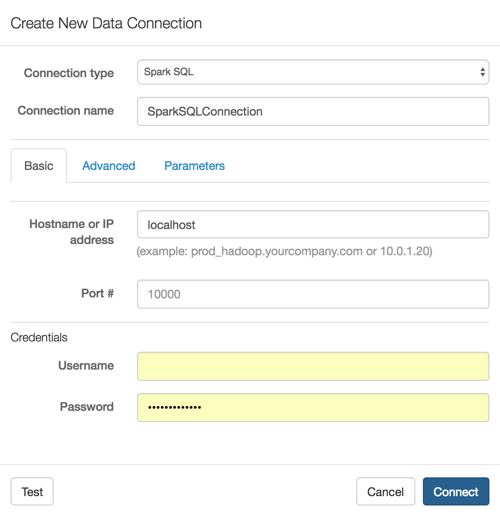
The Create New Data Connection modal window appears.
- In the Create New Data Connection modal window, under Connection type, select Spark SQL.
- Under Connection name, specify the name of the new connection. Here, we use SparkSQLConnection.
Under Hostname or IP address, specify the name of your database host, or its IP address; use
localhostwhen the data source is local.- Under Port #, enter the port number. The default port # for Spark SQL connections is
100000. Under Credentials, complete the following entries.
Under Username, enter the username for establishing the connection.
Under Password, enter the password for establishing the connection.
Click Advanced tab.
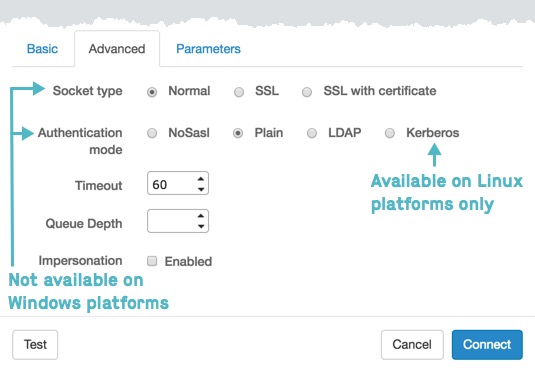
Advanced Connection Options Choose Socket type.
Note: Windows platforms support only normal sockets; therefore, socket options do not appear on the modal window.
Normal [default]
SSL
SSL with certificate
Choose Authentication mode.
Note: Windows platforms support only NoSasl authentication; therefore, authentication options do not appear on the modal window.
NoSasl
Plain
LDAP
Kerberos
Note: Kerberos authentication is only available on Linux platforms.
Specify Timeout interval. The default value is
60seconds.Choose Queue depth.
This controls the maximum number of simultaneous queries on the connection.
By default, the value is
2and does not have to be specified.Valid values are integers
1through100.
Click Parameters tab.
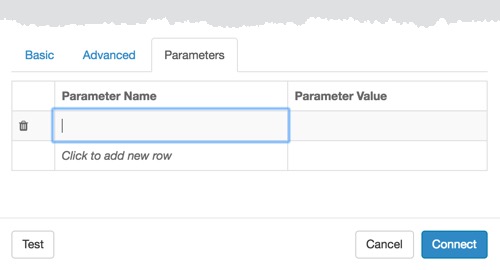
Specifying Connection Parameters Click the first row to add a Parameter name/value pair. Type in the parameters and their values.
If you want to remove a parameter, click (trash can) icon to remove existing parameters.
At the bottom of the modal, click Test.
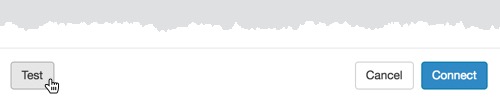
Testing the New Connection If the connection is valid, the system returns a 'Connection Verified' message.
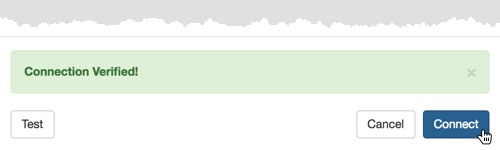
New Connection Verified - Click Connect.
After this operation succeeds, the new connection name appears on the side navigation bar.