Date/Time Display Formats
Data and Time formatting in Arcadia Enterprise offers common notation options as built-ins. It also offers a simple customization component that transforms date/time information.
By default, data/time records appear in the form [YYYY]-[MM]-[DD] [hh]:[mm]:[ss].[sss], in most-to-least significant order. This is consistent with the ISO 8601 Date and Time Specification.
The following steps demonstrate the use date/time display formatting interface for Basic Formats and Custom Formats. We are using the NYC Taxicab Rides Detail dataset, based on the table main.trips-detail.
Basic Formats for Date/Time
- Create a new visual.
- In the tables chart type, place the field pickup_neighborhood on the Dimensions shelf, and the field pickup_datetime on the Measures shelf.
- Click the icon to the right of the
pickup_datetimefield. - In the dropdown, click Display Format.
-
In the Enter Display Format modal window,
-
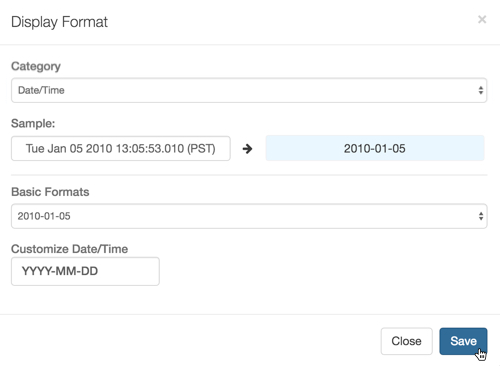
Under Category, select Date/Time.
Notice that this action adds a Basic Formats selector, and a Customize Date/Time field.
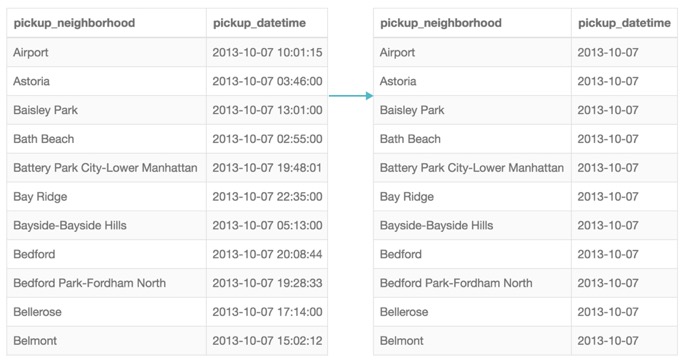
- Under Basic Formats, select 2010-01-05.
- Click Save.
-
-
Click Refresh Visual.
Notice the change to the number format in column pickup_datetime.
Custom Formats for Date/Time
- Create a new visual.
- In the tables chart type, place the field pickup_neighborhood on the Dimensions shelf, and the field pickup_datetime on the Measures shelf.
- Click the icon to the right of the
pickup_datetimefield. - In the dropdown, click Display Format.
-
In the Enter Display Format modal window,
-
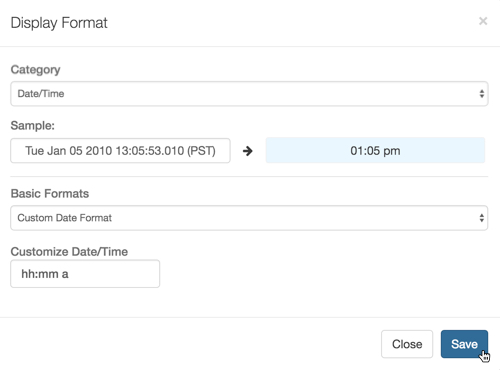
Under Category, select Date/Time.
Notice that this action adds a Basic Formats selector, and a Customize Date/Time field.
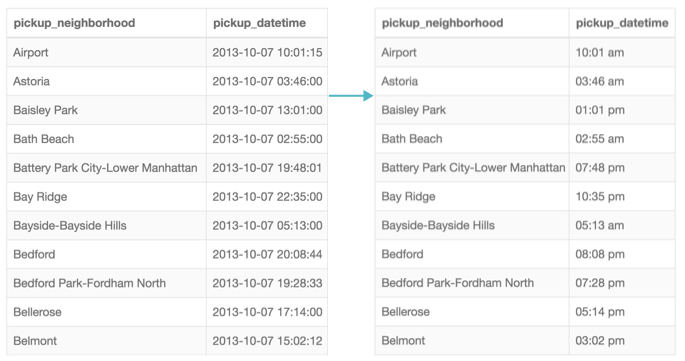
- Under Customize Date/Time, enter the mask hh:mm a.
- Click Save.
-
-
Click Refresh Visual.
Notice the change to the number format in column pickup_datetime.