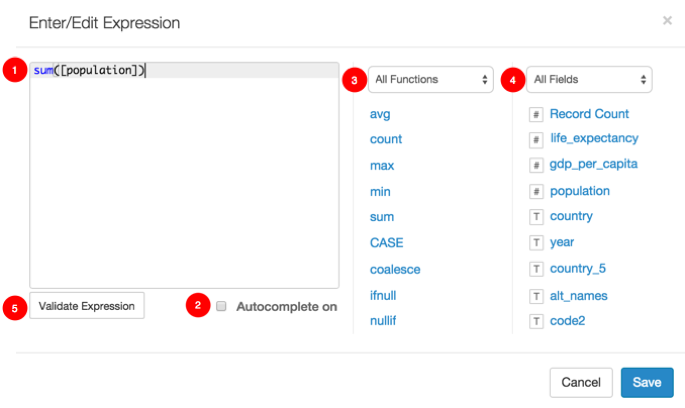
Enter or Edit Expressions
Arcadia provides you with an option to manually adjust expressions that modify the column values used in the visual. This article describes the Enter /Edit Expression interface, and provides some usage examples in Example 1 and Example 2..
- Ensure that column names in the expressions are bracketed, like this:
[field]. - When manually editing expressions, you can apply changes that are equivalent to all transformation described in Customizing Field Options, except those covered by Order and Display Format. Entering these changes causes an error.
To set the customize expressions, follow these steps.
When creating or editing a visual, determine which field variable you want to change.
The shelves that support the expression edit option depend on the visual type, and are typically available for X and Y axes, Measures, Dimensions, Colors, Tooltips, and Filters.
Click the icon to the right of the variable.

Accessing Field Options - In the dropdown, click Enter/Edit Expression.
In the Enter/Edit Expression modal window that appears after you make this choice, change the expression.
See Example 1 and Example 2 for demonstration of some of the varied expressions you can build using the expression editor.
- Expression Text: Enter/modify the expression directly in the text field.
- Autocomplete: Click this field to turn expression autocomplete on or off.
Functions: By default, all available functions show. Scroll down to find a specific function, and click it to add it to the Expression Text field. Note the location of the cursor.
Alternatively, click the All Functions menu to see the function groupings and select the functions from these. Available expression groupings include Aggregate, Conditional, Mathematical, Miscellaneous, String, Filter, and Date and Time.
All Fields: By default, all available fields show. Scroll down to find a specific field, and click it to add it to the Expression Text field. Note the location of the cursor.
Alternatively, click the All Fields menu to see the Measures and Dimensions groupings, and select the fields from these.
- Validate Expression: Validate the expression that you build.
- Click Save.
- Click Refresh Visual.
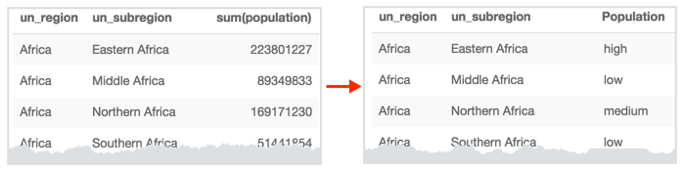
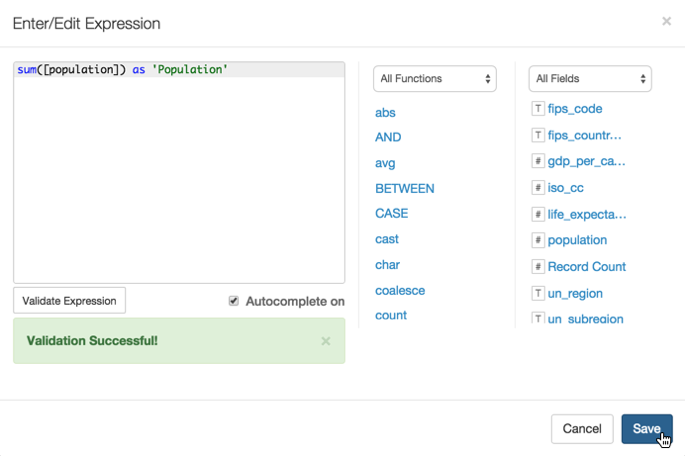
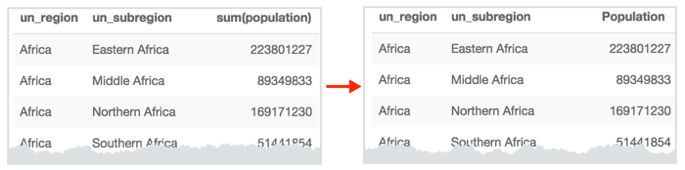
Example 1: Simple Alias expression
You can add an alias to the expression simply by typing it in the text field:
sum([population]) as 'Population'
Remember to validate the expression and click Save.
After clicking Refresh Visual, you will see a change similar to the one in the following image:
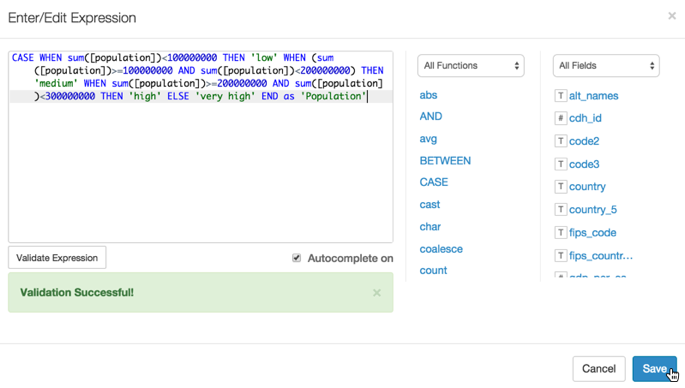
Example 2: CASE expression
You can add a CASE expression to categorize the values, by selecting CASE in the functions area, and using autocomplete. The expression used in this example follows:
CASE
  WHEN sum([population])<100000000 THEN 'low'
  WHEN (sum([population])>=100000000 AND sum([population])<200000000) THEN 'medium'
  WHEN sum([population])>=200000000 AND sum([population])<300000000 THEN 'high'
  ELSE 'very high'
END
as 'Population'
Remember to validate the expression and click Save.
After clicking Refresh Visual, you will see a change similar to the one in the following image: