Importing Apps
In Arcadia Enterprise, you can import apps from another system. All you need the is appropriate JSON file that captures the complete definition of the app, including its dpendencies: its own app definition, subgroup app definitions, visuals, dashboards, datasets, and custom styles.
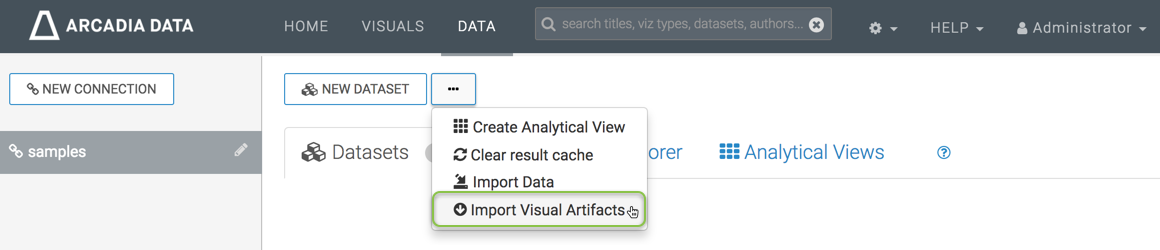
- Click Data in the top navigation menu.
-
Select the connection where to import the artifacts.
We selected Samples, because we are connecting to the same data source for both systems.
- At the top of the screen, click the (supplemental) menu.
-
In the (supplemental) menu, click the Import Visual Artifacts option.
-
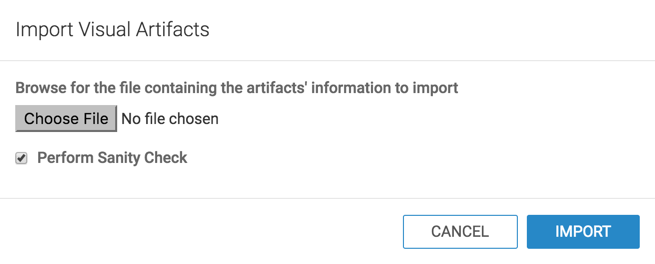
The Import Visual Artifacts window modal appears.
-
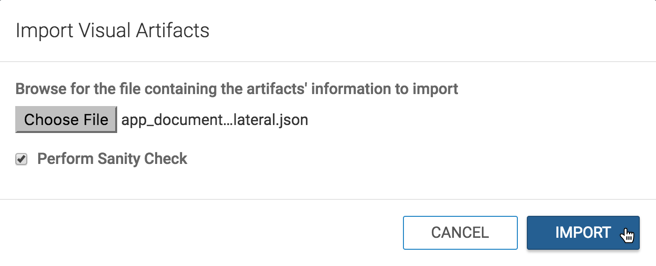
Click Choose File.
-
Select the backup file in your file system. Here, we are getting
app_documentation_collateral.json, the file created in Exporting Apps.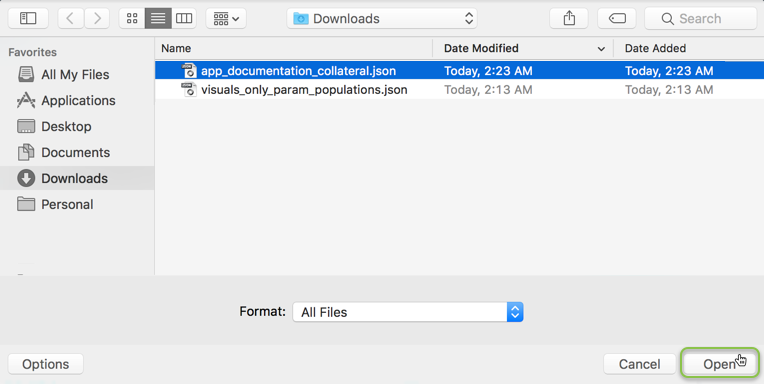
-
In the updated Import Visual Artifacts modal, ensure that you select the Perform Sanity Check option, and then click Import.
-
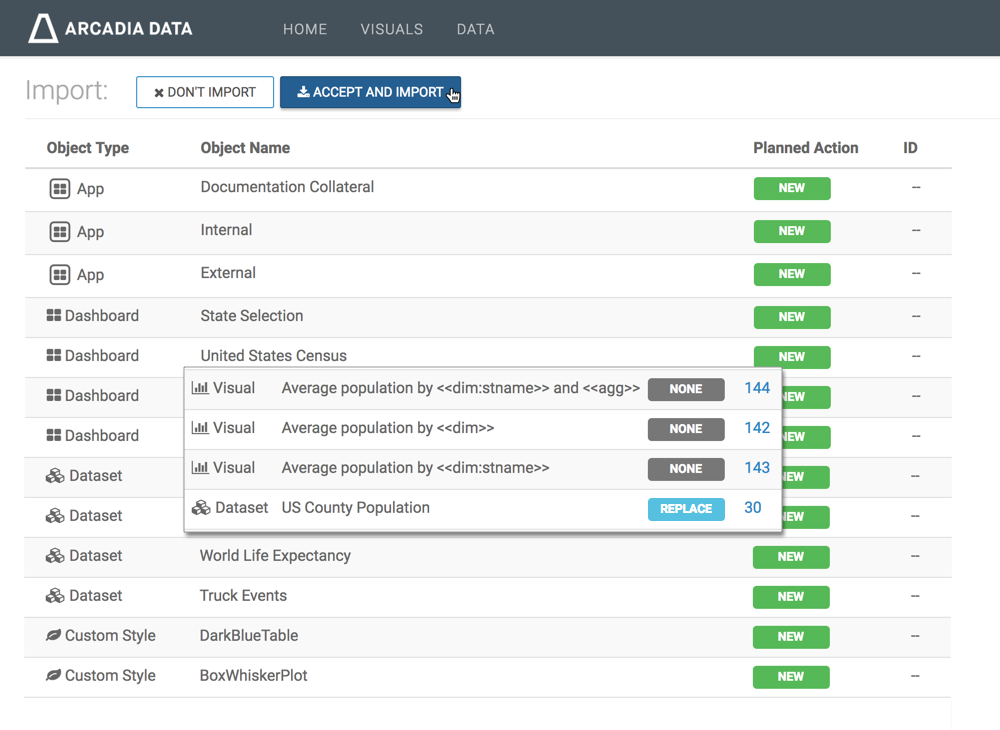
After processing the import
*.jsonfile, Arcadia Enterprise opens the Import interface to show the imported visual artifacts. Notice that all items saved into theapp_documentation_collateral.jsonfile during export appear on the interface.Notice also that the Planned Action column shows that this is a new import for most artifacts, and they don't have an assigned ID. However, if you scroll down in the list, you will find that the three visuals we imported earlier, in Importing Visuals and Dashboards, appear with Planned Action set to None. This is because these visual artifacts were previously imported from the same system, and they have not changed from the original import. The dataset that we imported earlier, US County Population changed (we created a derived field that did not impact these three visuals), so its status is Replace.
Click Accept and Import.
-
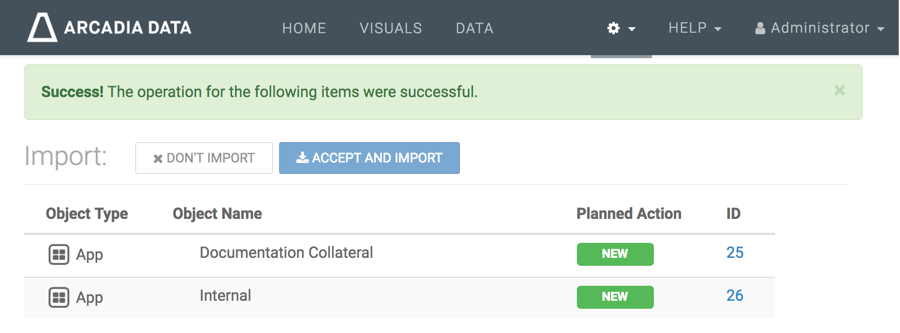
After the import completes, a Success message appears on the Import interface.
Notice that all the artifacts have an assigned ID. These are generated by the system, sequentially. Visuals/Dashboards and datasets have separate id queues.
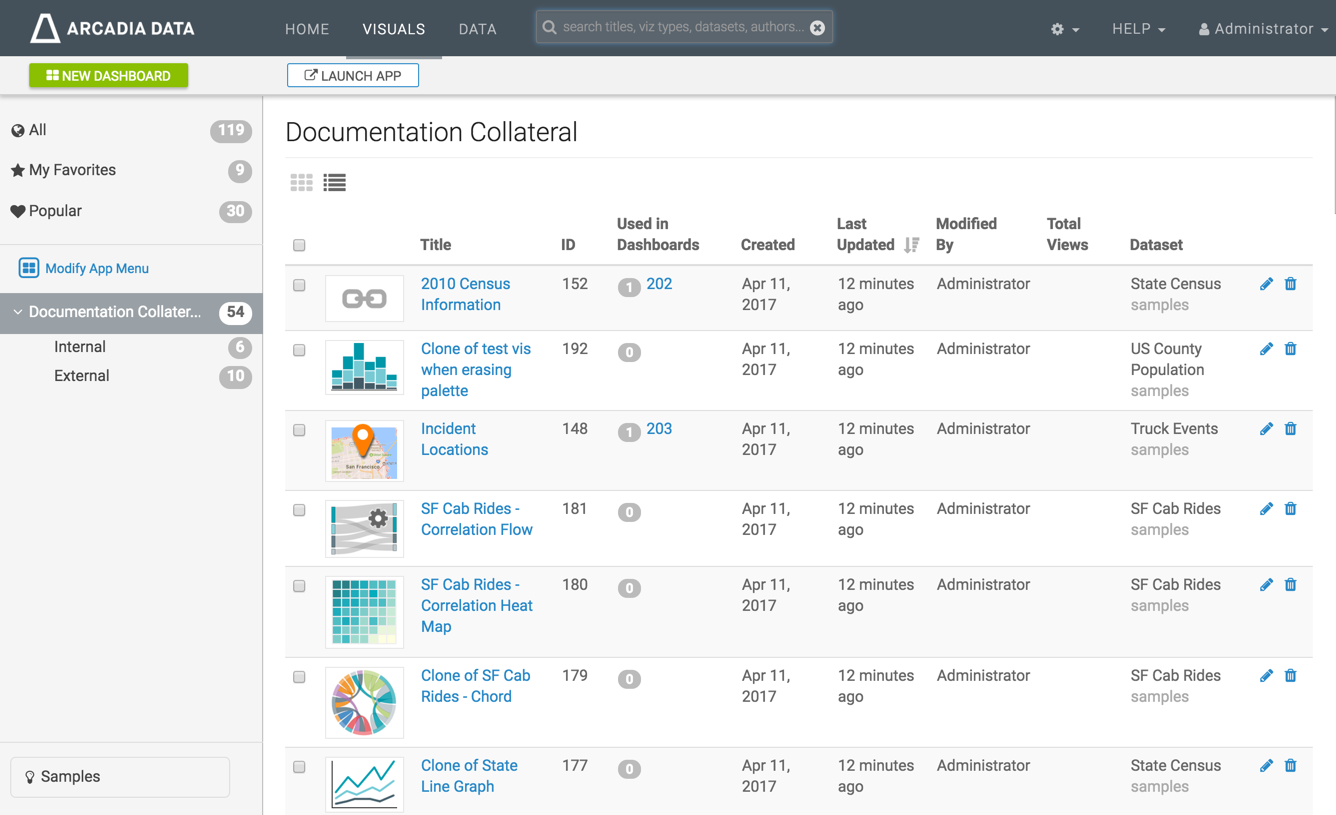
- Click Visuals in the top navigation menu.
-
By default, the imported app is not visible in the navigation menu.
To make it visible, click Modify App Menu in the left navigation.
-
In the Modify App Menu modal, select the visibility option for the newly imported app, and click Save.
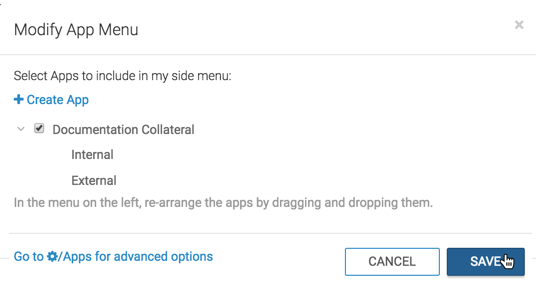
You can now see the app Documentation Collateral in the left menu.