Creating a New Connection
The following steps demonstrate how to create a simple Arcadia Engine data connection.
- On the main navigation bar, click Data.
- In the Data interface, click on the Datasets tab.
- In the side bar, click New Connection. The Create New Data Connection modal window appears.
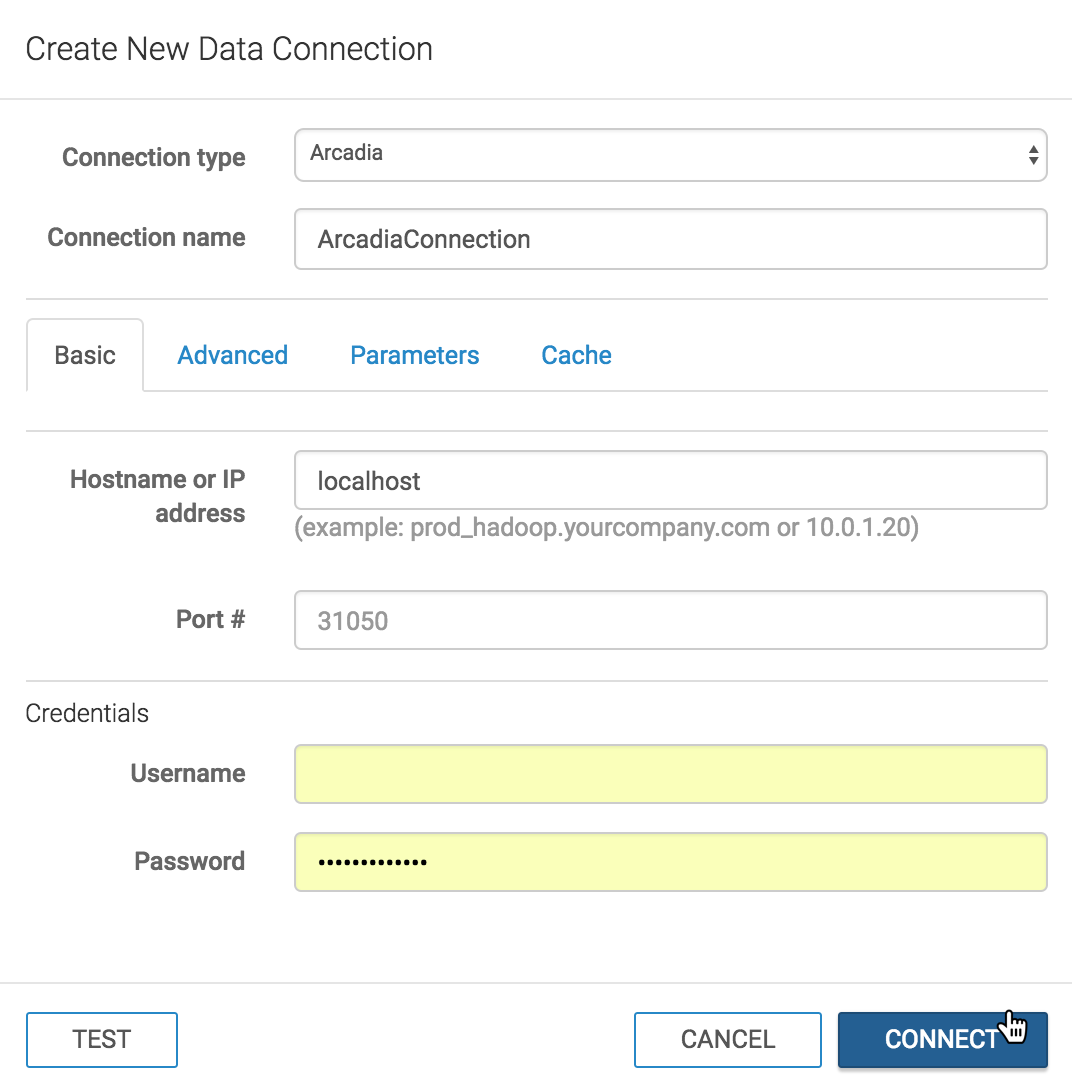
- In the Create New Data Connection modal window, under Connection type, select Arcadia.
- Under Connection name, specify the name of the new connection. Here, we use
ArcadiaConnection. - Under Hostname or IP address, specify the name of your database
host, or its IP address; use
localhostwhen the data source is local. Under Port #, enter the port number. The default port # for Arcadia Engine connections is
31050.Under Credentials, complete the following entries.
-
Under Username, enter the username for establishing the connection.
-
Under Password, enter the password for establishing the connection.
-
- At the bottom of the modal, click Test. If the connection is valid, the system returns a 'Connection Verified' message.
After this operation succeeds, the new connection name appears on the side navigation bar.
To customize the connection, read our full article on Arcadia Connections in the User Guide, and see the options available under the Advanced, Parameters, and Cache tabs.
Tip. This linked video demonstrates how to connect to a data source, import
data, create a dataset, and create visuals from the dataset.