Set Options and Complete Installation on Ambari
After adding Arcadia Enterprise to Ambari Services, set options in the Add Service Wizard interfaces to complete the installation.
Follow these steps to set options and complete the installation.
-
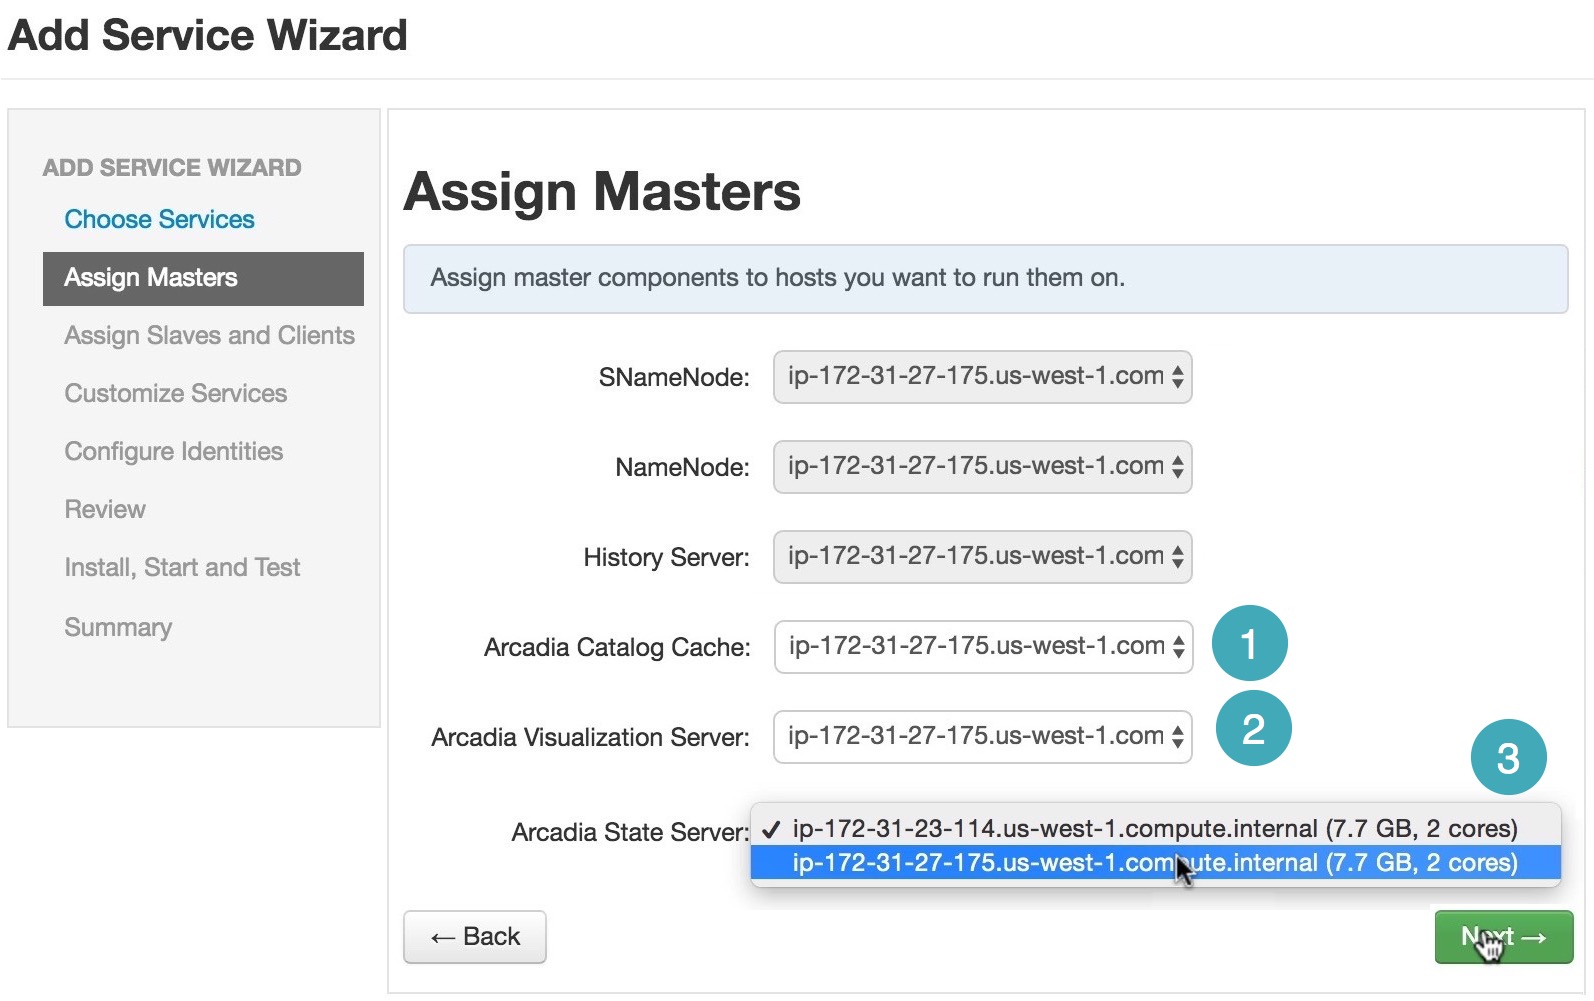
In the Assign Masters interface, change the options for these master servers according to your installation requirements.
We changed from the default server ip-172-31-23-114 to ip-172-31-27-175.
- Arcadia Catalog Cache
- Arcadia Visualization Server
- Arcadia State Server
Click Next.
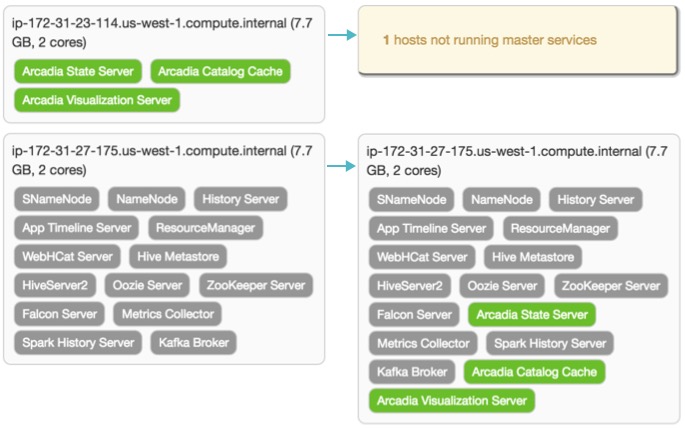
Selecting Arcadia Enterprise Masters Note the change in the reporting on the two machines.
Selecting Arcadia Enterprise Master Servers On the Assign Slaves and Clients interface, select Arcadia Analytics Engine for all nodes.
Click Next.
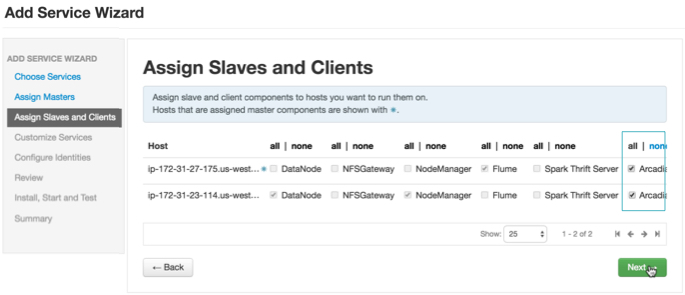
Selecting Arcadia Enterprise for Slaves - [Optional] To change the Arcadia user name and user group to a custom Arcadia
Service user name and user group, follow these steps:
Note that to configure Ranger security and auditing configuration, you must use the Arcadia Service user name. See Ranger Auditing on Kerberized Clusters with a Custom Arcadia Service Account.
-
On the Customize Services interface, click Misc.
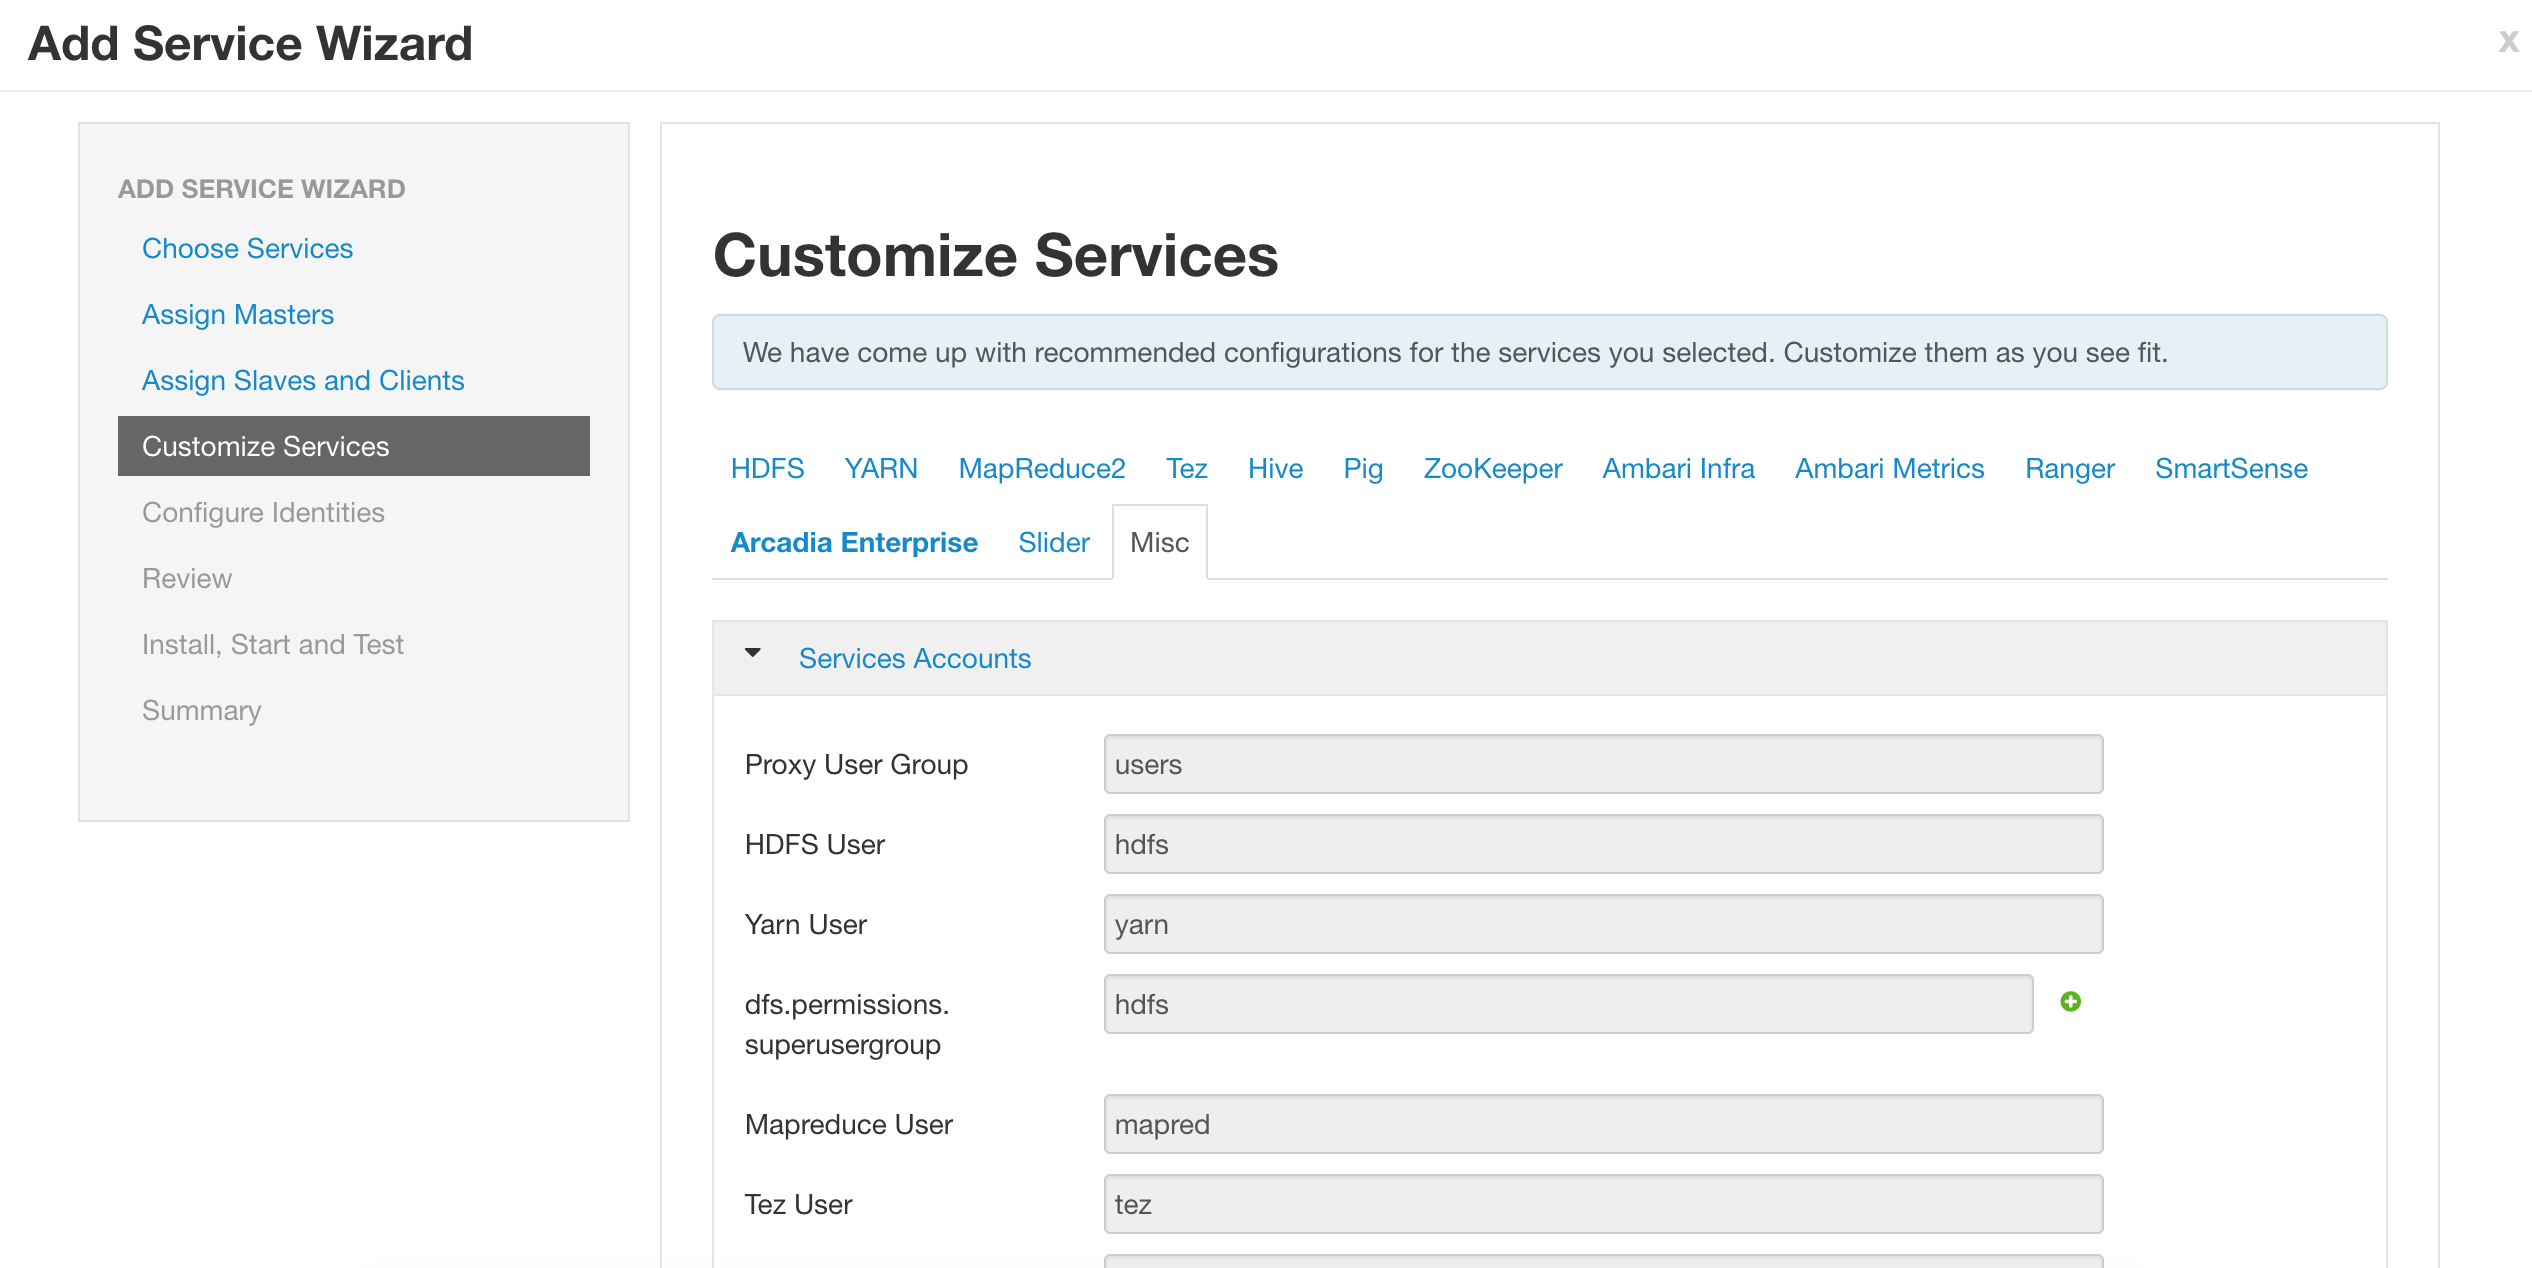
Arcadia Enterprise Service Configuration: Click Misc -
Scroll down and enter an Arcadia service account user name in the Arcadia User field. We entered
custarcuser1. -
In the Arcadia Group field, enter an Arcadia service account group name. We entered
custarcgroup1.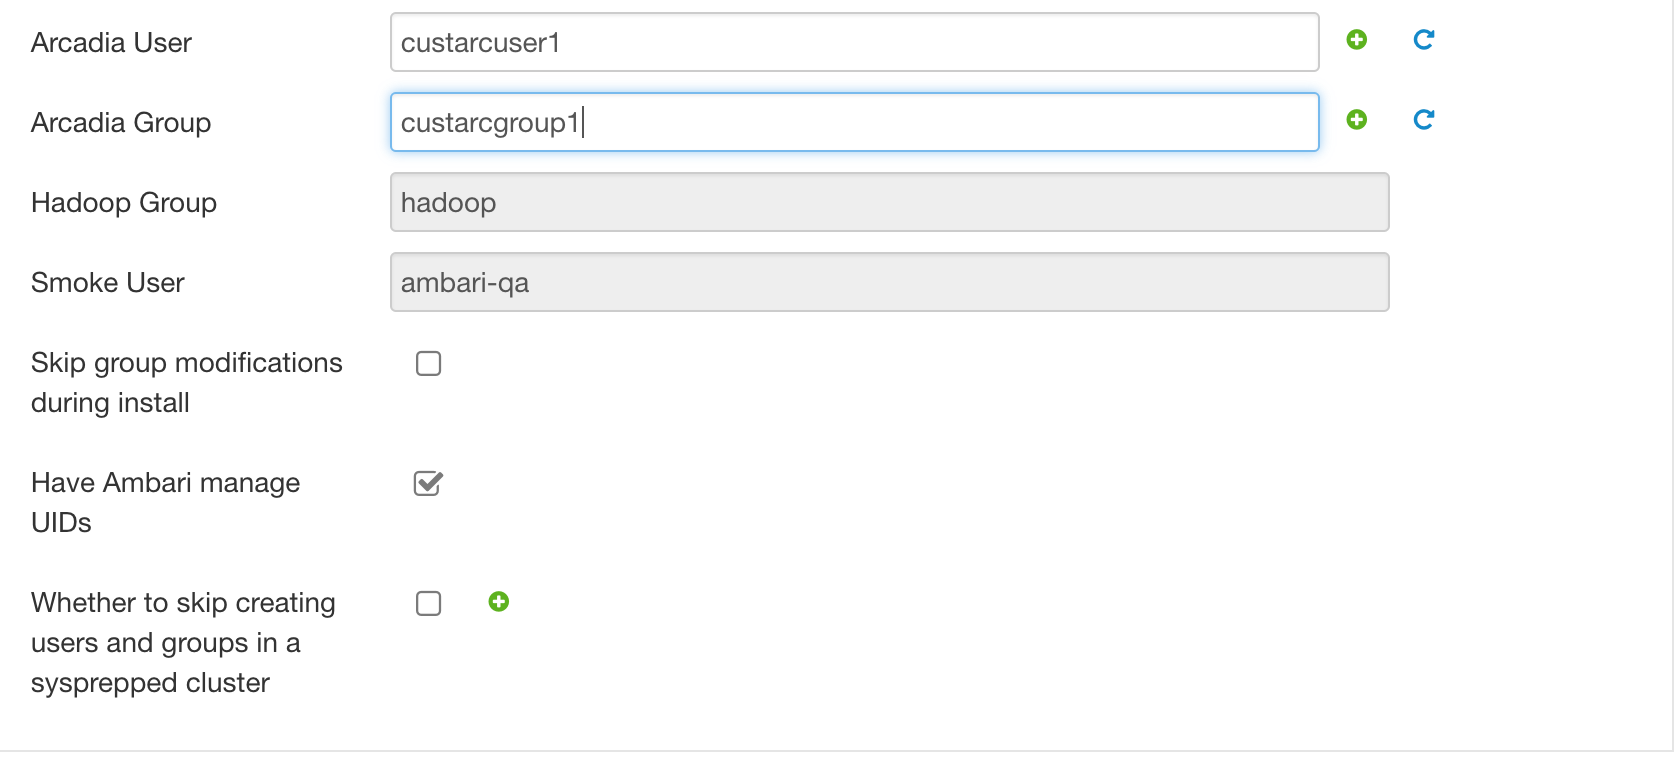
Configure Arcadia Service Account User and Group
-
-
On the Customize Services interface, check the various configuration settings.
Click Next.

Arcadia Enterprise Service Configuration -
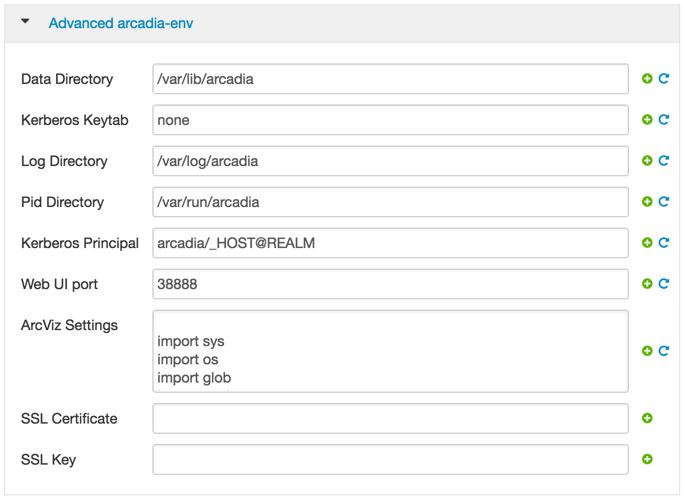
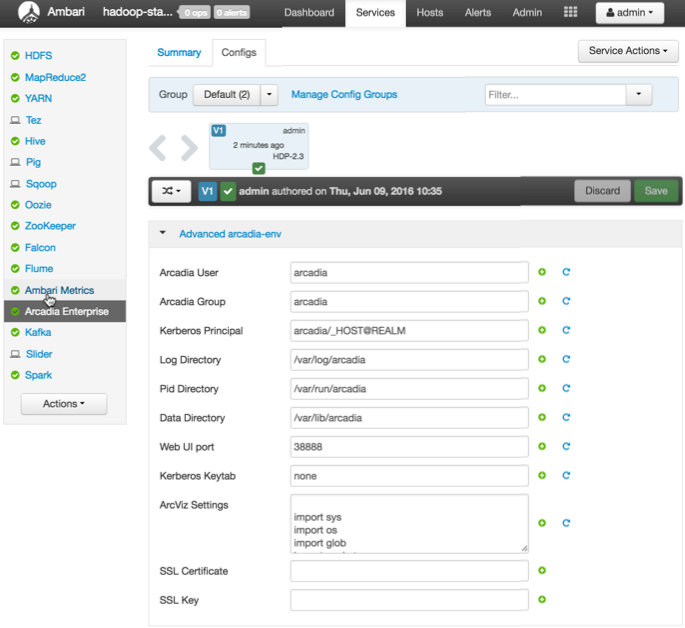
Click the (right arrow) icon to the left of Advanced arcadia-env. Note the details of Arcadia Enterprise environment configuration.
-
Click Next.
Arcadia Enterprise Environment Configuration -
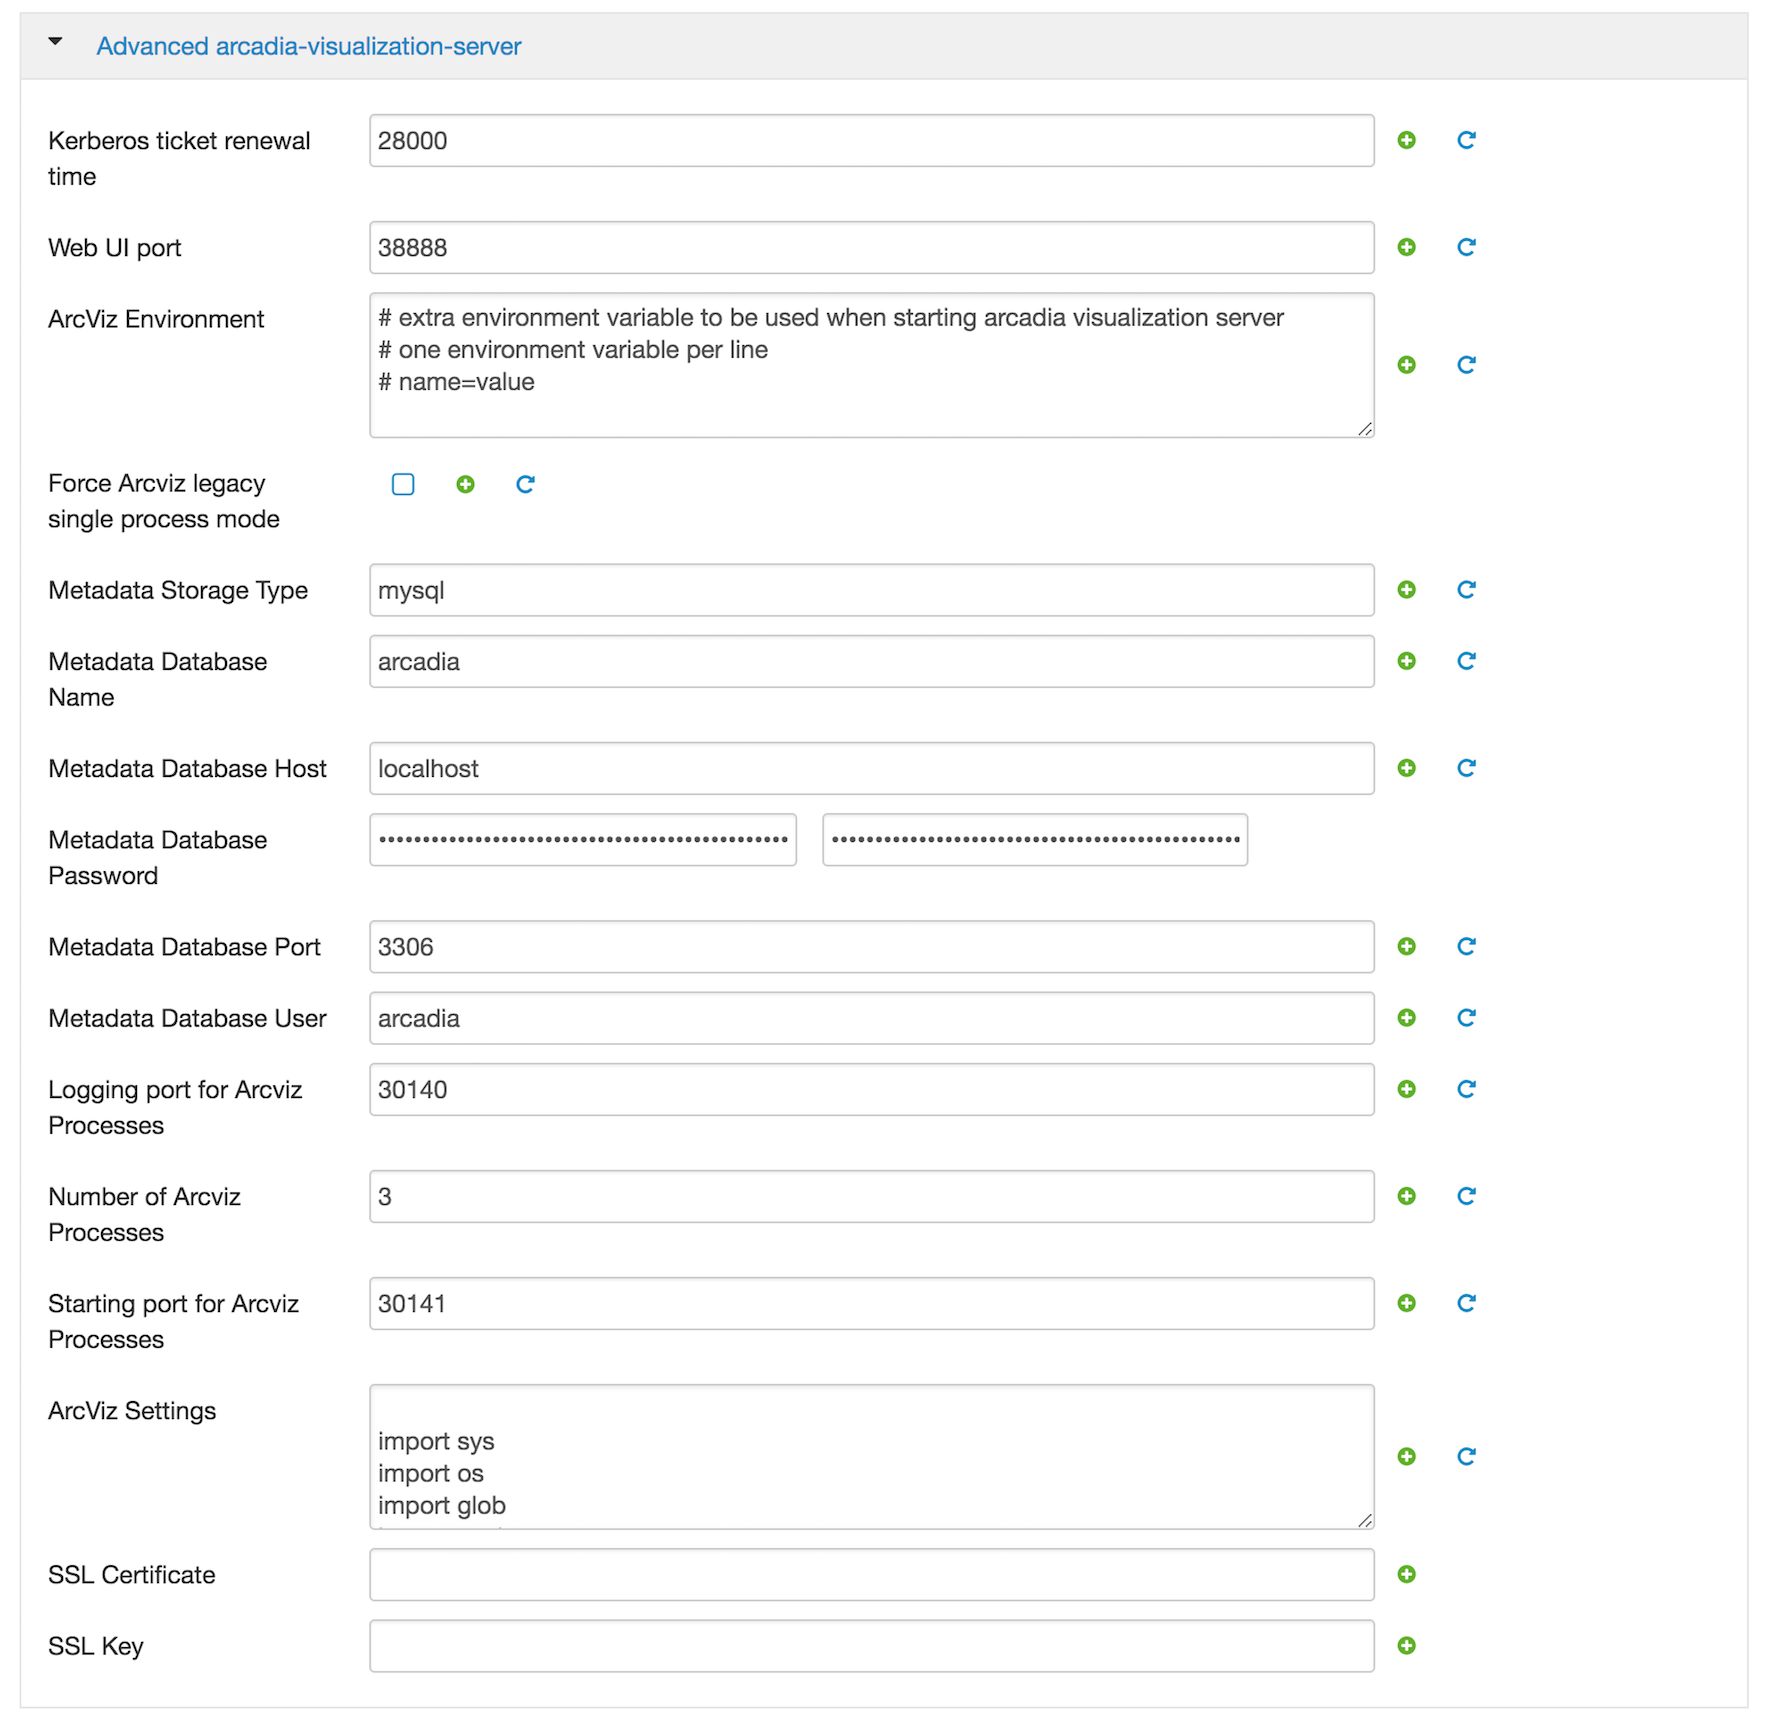
Click the (right arrow) icon to the left of Advanced arcadia-visualization-server. Note the details of Arcadia Enterprise visualization server configuration.
Note that if you select SQLite under Metadata Storage Type, Arcadia Visualization Server will run in legacy single process mode.
You can select one of the other options, depending on your system architecture and database. If you choose MySQL, Oracle, or PostgreSQL, the database must be already in place, otherwise you must specify the following information:
- Data Directory
- Metadata Database User
- Metadata Database Password
- Metadata Database Host
- Metadata Database Name
-
Click Next.
Arcadia Enterprise Visualization Server Configuration -
On the Review interface, confirm that all Arcadia Enterprise services are assigned to the correct nodes.
[Optional] Click Print to save an external copy of the configuration record.
Click Deploy.
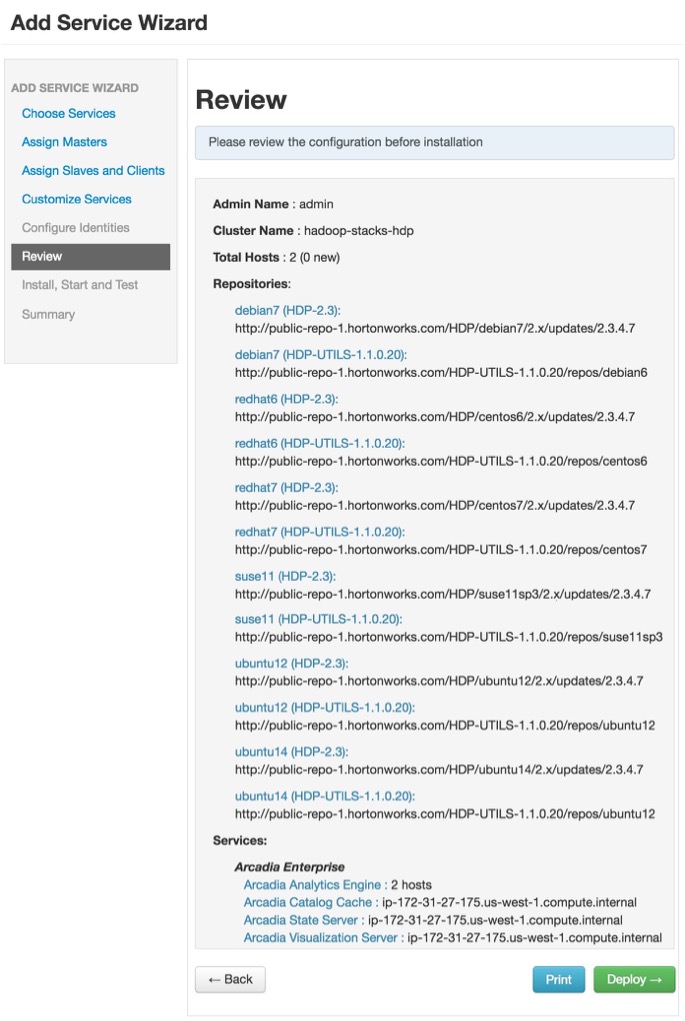
Arcadia Enterprise Service Configuration Review and Deployment -
Note the install process artifacts.
Prepare to install appears briefly.

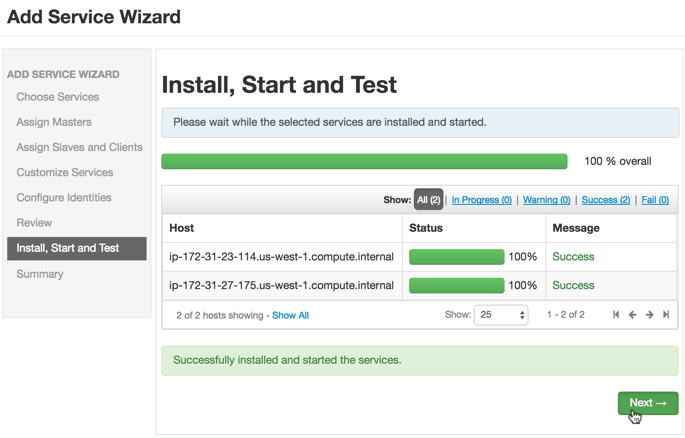
Then Install, Start and Test interface appears; it shows the progress of the installation.
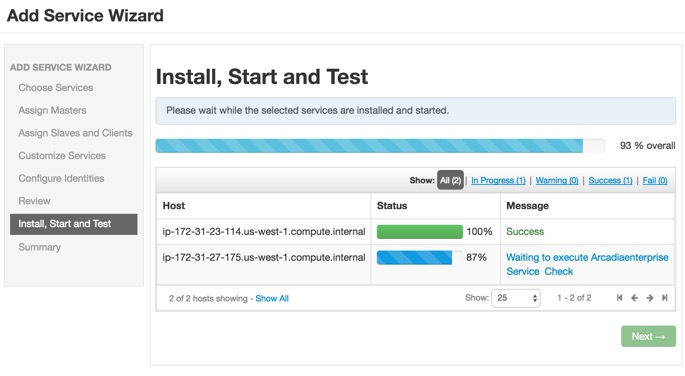
Arcadia Enterprise Install on Ambari After install completes, click then Next.
Arcadia Enterprise Install on Ambari is Finished On the Summary page, you can ignore alerts about 3rd party services.
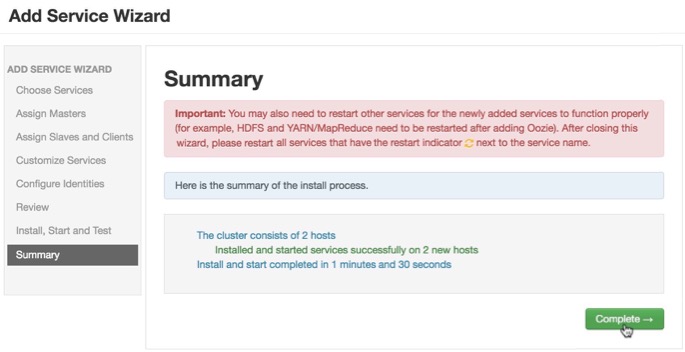
Arcadia Enterprise Install on Ambari is Complete - Click Complete to finish the installation and close the Add Service Wizard interface.
-
After the install completes, note that the Arcadia Enterprise entry appears on the left navigation menu, and its status is green. If you click on Arcadia Enterprise, it shows the Summary of the service installation.
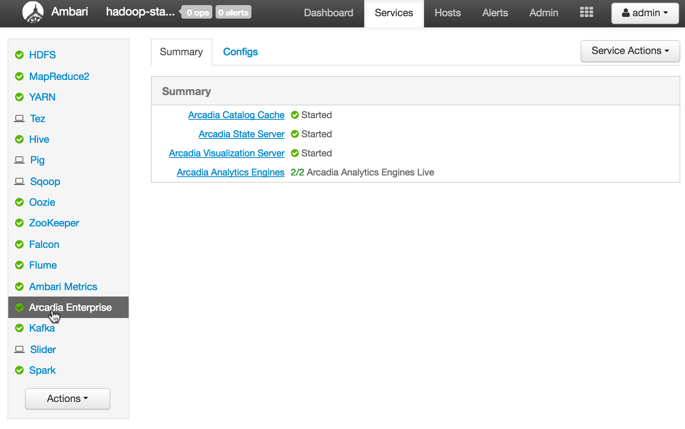
Arcadia Enterprise Installed Status -
[Optional] To see or change the configuration details, click the Configs tab near the top of the interface.
Arcadia Enterprise Installed Configs
Arcadia Enterprise is now successfully installed on the cluster.