Creating an Analytical View Over a Base Table
You can create a new analytical view based on a base table.
The following steps create an analytical view over a base table.
- Click Create Analytical View.
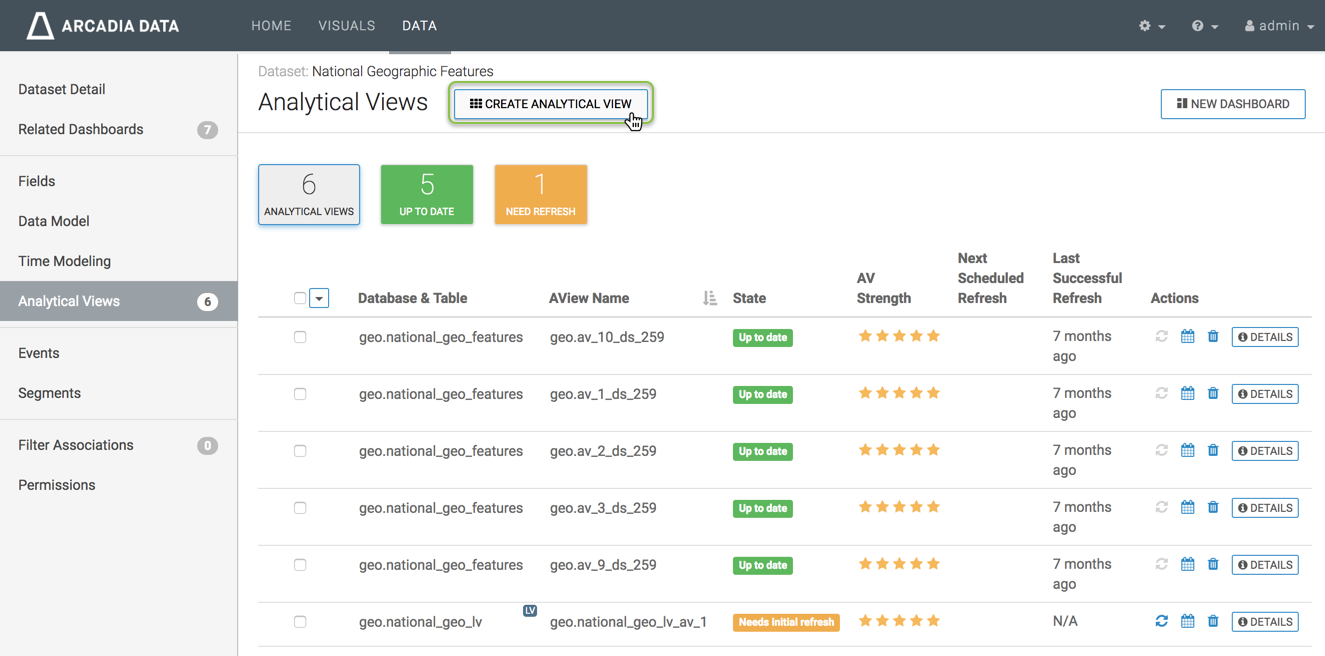
Creating a New Analytical View -
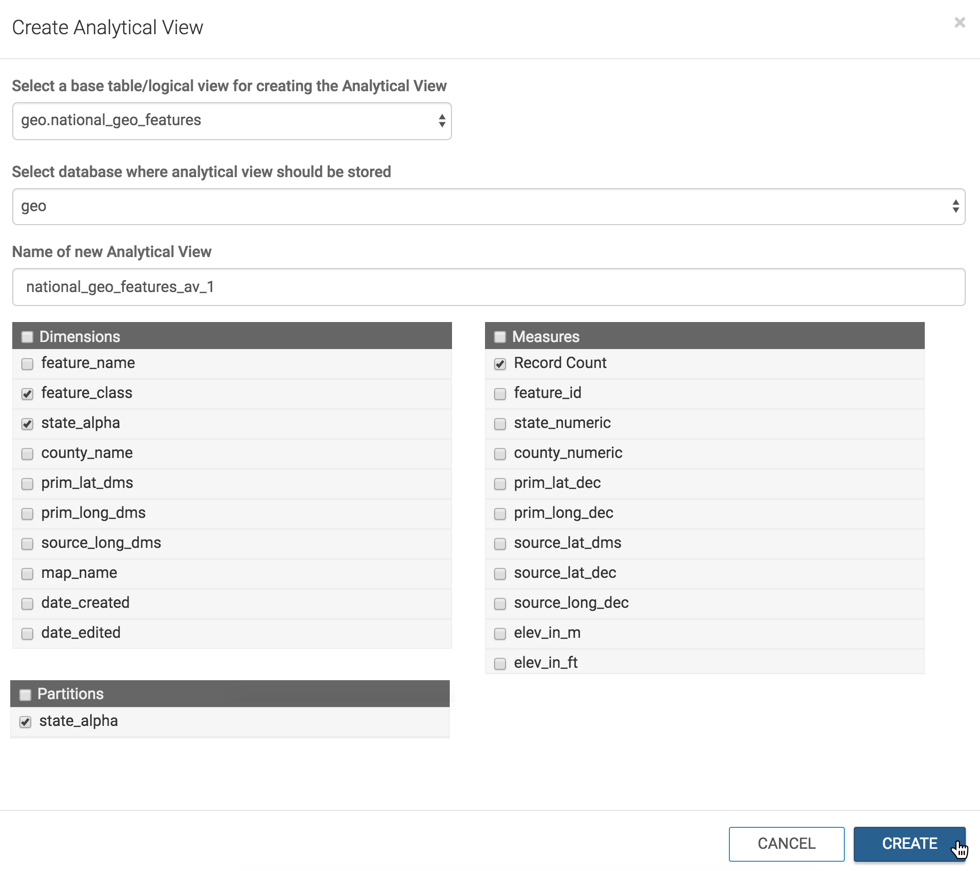
When the Create Analytical View window modal opens, select the primary table as a foundation for building this analytical view.
In the Create Analytical View window modal, complete the following:
-
Under Select a base table/logical view for creating the Analytical View, select this table:
geo.national_geo_features.Note the basic format notation:
databaseName.[logicalViewName|tableName]. -
Under Name of new Analytical View, accept the default name, or enter the name of the new analytical view. We used the default,
geo.national_geo_features_av_1.Note that the naming convention for analytical views follows this pattern:
[logicalViewName|tableName]_av_n, wherenis1,2, and so on. -
Under Dimensions, Measures, and Partitions, select the items that are relevant to the queries supported by the new analytical view. Note that this time, Partitions appear because this view is based on a partitioned table.
We used Feature Class, County Name, Record Count, and State Alpha in this analytical view.
- Click Create.
Creating an Analytical View Over a Base Table -
The new analytical view appears on the list of analytical views for the dataset. Note that the new view requires an initial refresh.
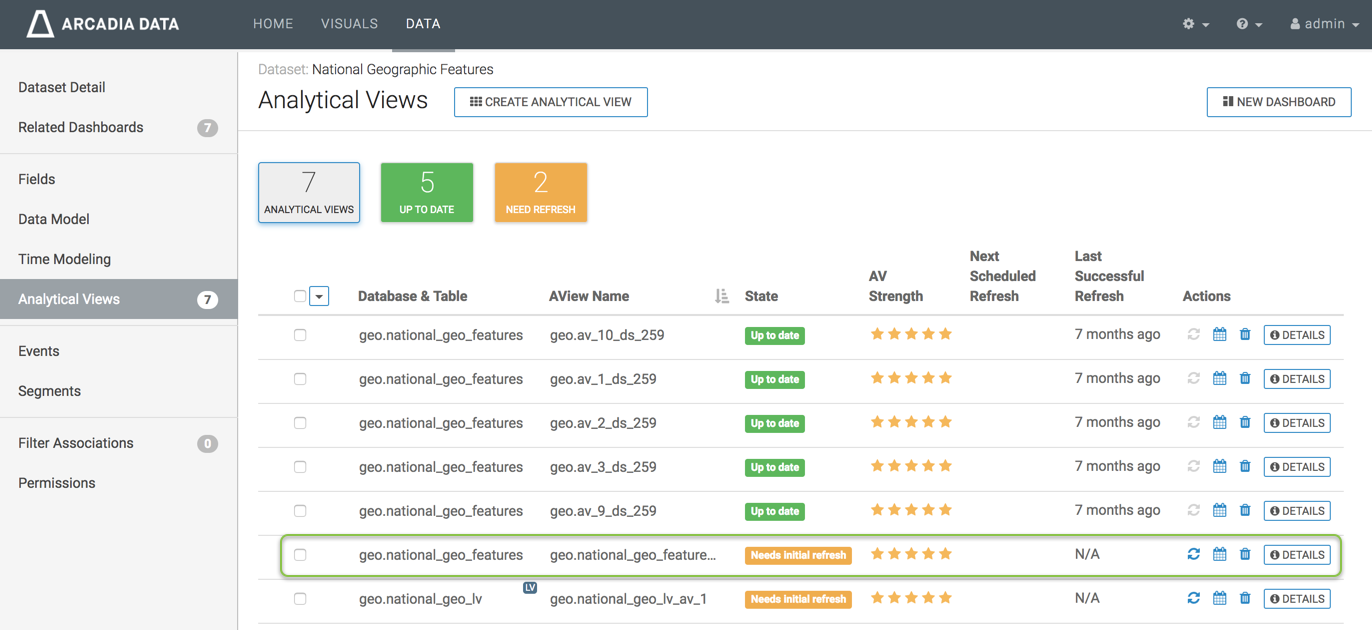
New Analytical View Over a Base Table
You can see and manage all analytical views, across all datasets, in the general Analytical Views interface described in Managing Analytical Views.
To refresh the analytical views, see Refreshing Analytical Views.