Creating New Custom Dateranges
To create a new set of custom date range, you must define each custom range in turn.
Here, we demonstrate how to build a set of custom date ranges called My Date Range Set. We define the first one date range, 3 min, in detail. Then, we define the rest of them in similar manner.
Follow these steps:
-
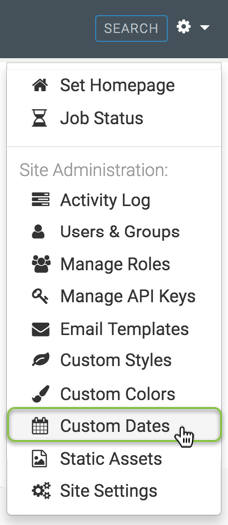
Click the (gear) icon to open the Administration menu, and select Custom Dates.
-
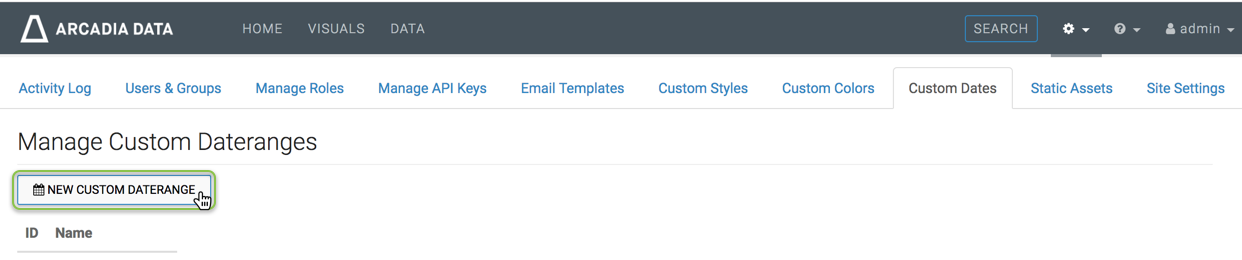
In the Manage Custom Dateranges interface, click New Custom Daterange.
-
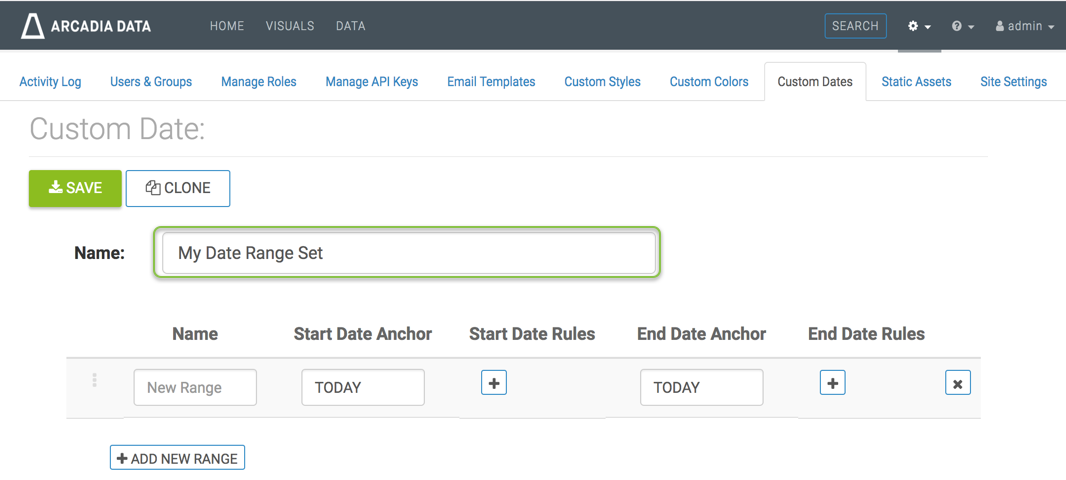
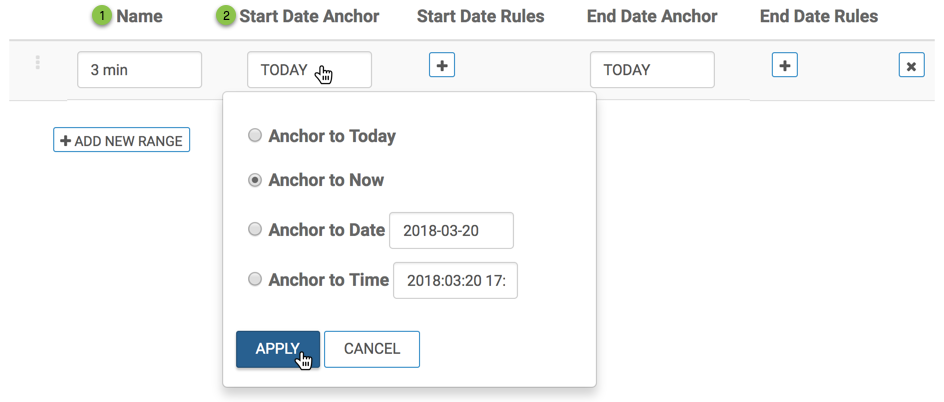
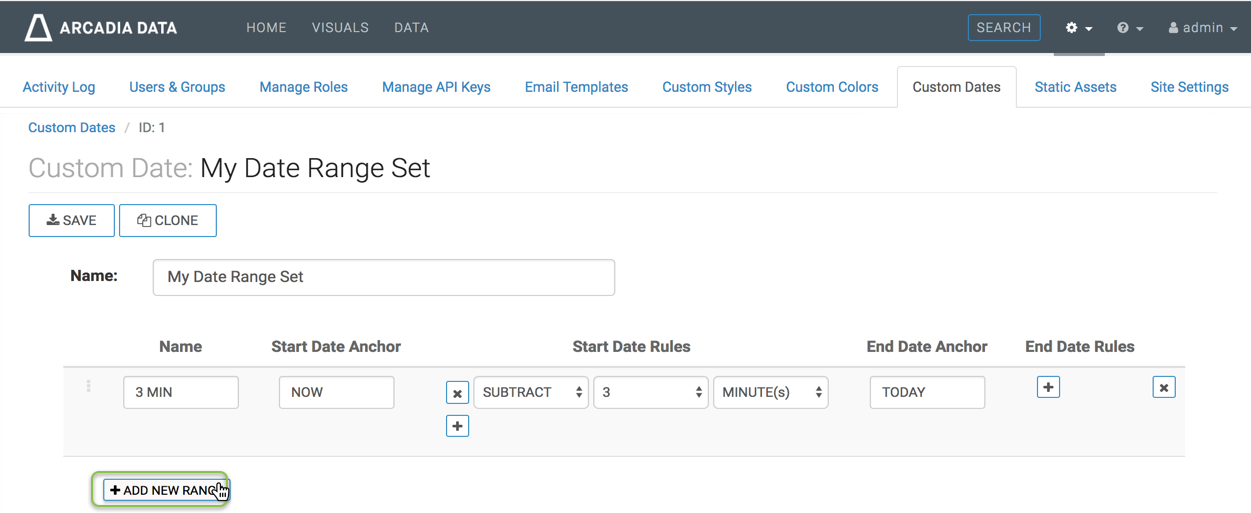
In the Custom Date interface, enter the Name of the custom date.
We used My Date Range Set.
-
In the list of ranges, define the first range:
- Name
Enter the Name of the new range; we used 3 min.
- Start Date Anchor
Under Start Date Anchor, select one of the options:
- Anchor to Today (default)
- Anchor to Now
-
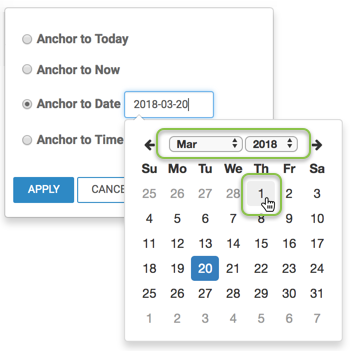
Anchor to Date, which is the current date by default. To specify an alternate date, click in the edit field and select from the calendar interface.
-
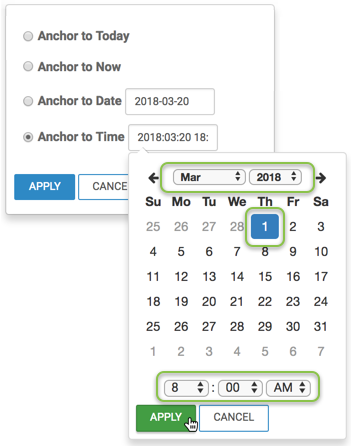
Anchor to Time, which is the current timestamp by default. To specify an alternate timestamp, click in the edit field and select from the calendar and time interface.
We selected Anchor to Now.
Click Apply.
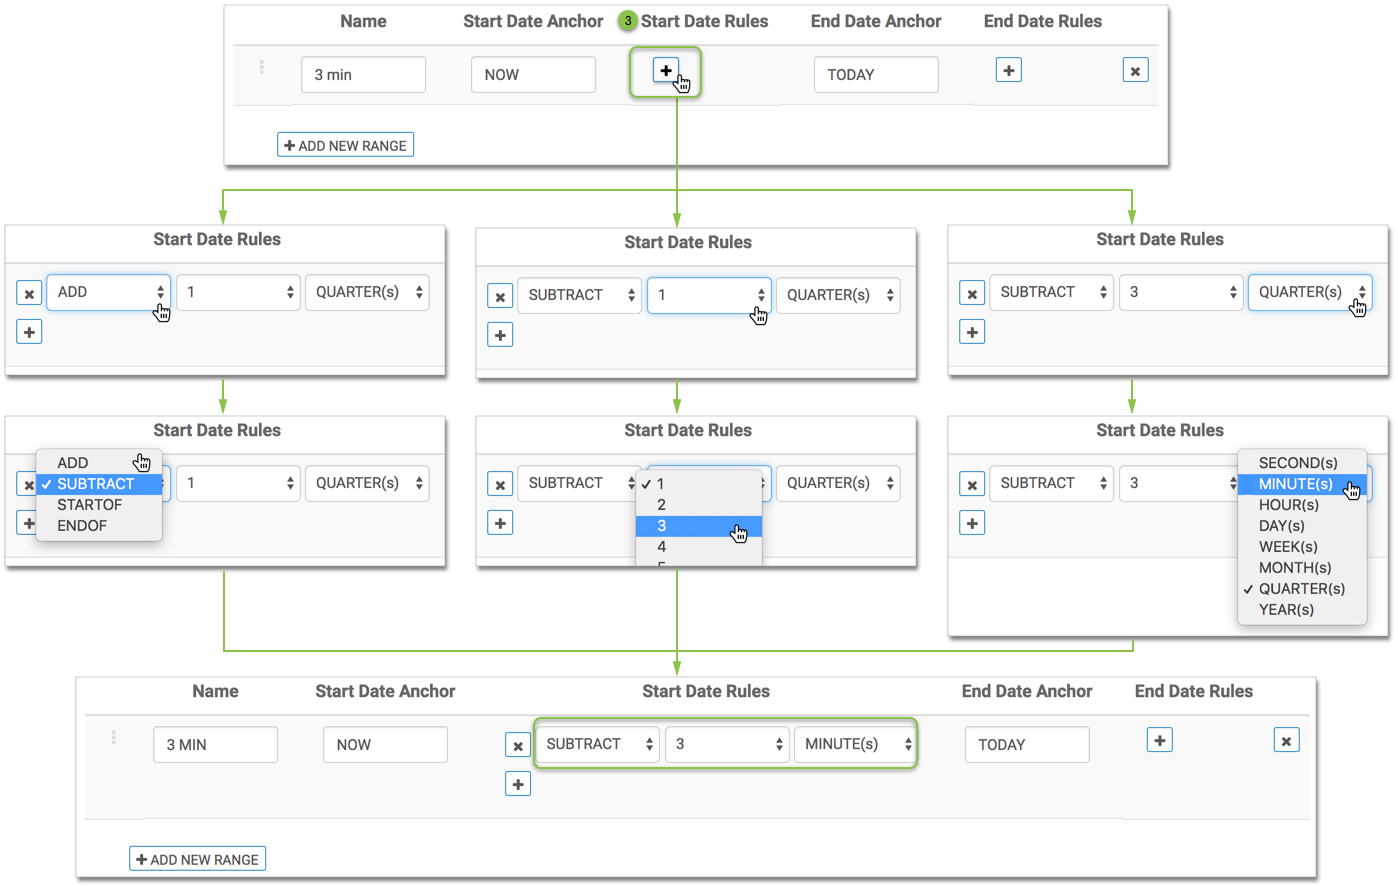
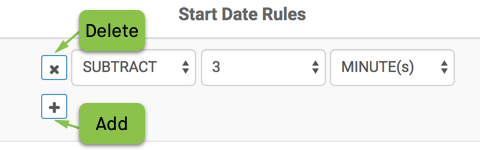
- Start Date Rules
Under Start Date Rules, click the (plus) icon, and proceed to specify the first stat date rule:
- Click the text box with operations (Add), and select the operation for the date rule: Add (default), Subtract, Startof, or Endof. We used Subtract.
- Click the text box with numbers, and select the appropriate time offset. We used 3.
- Click the text box with units, and select one of the time units from the menu: Seconds, Minutes, Hours, Days, Weeks, Months, Years, or Quarters (default). We selected Minutes.
This completes the specification of the first start date rule.
To delete or remove a rule, click the (delete) icon beside the rule.
To delete or remove a rule, click the (delete) icon beside the rule.
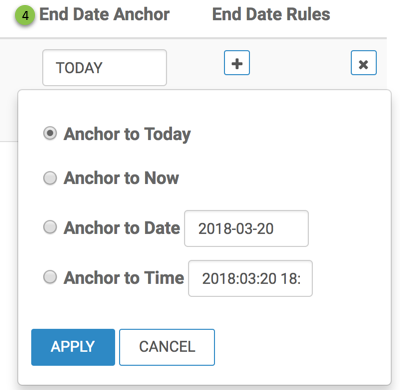
- End Date Anchor
This works just like the Start Date Anchor described in 4.b.
Under End Date Anchor, select one of the options:
- Anchor to Today (default)
- Anchor to Now
- Anchor to Date, which is the current date by default. To specify an alternate date, click in the edit field and select from the calendar interface.
- Anchor to Time, which is the current timestamp by default. To specify an alternate timestamp, click in the edit field and select from the calendar and time interface.
Click Apply.
We did not make a selection, and left this setting at default.
- End Date Rules
This works just like the Start Date Rules described in 4.c.
Under End Date Rules, click the (plus) icon.

Proceed to specify the first rule:
- Click the text box with operations (Add), and select the operation for the date rule: Add (default), Subtract, Startof, or Endof.
- Click the text box with numbers, and select the appropriate time offset.
- Click the text box with units, and select one of the time units from the menu: Seconds, Minutes, Hours, Days, Weeks, Months, Years, or Quarters (default).
This completes the specification of the first end date rule.
We did not make a selection, and left this setting at default.
To delete or remove a rule, click the (delete) icon beside the rule.
To delete or remove a rule, click the (delete) icon beside the rule.
- Delete Date Range
To remove the entire date range, click (remove) icon at the end of the row that specifies the date range.

- Name
-
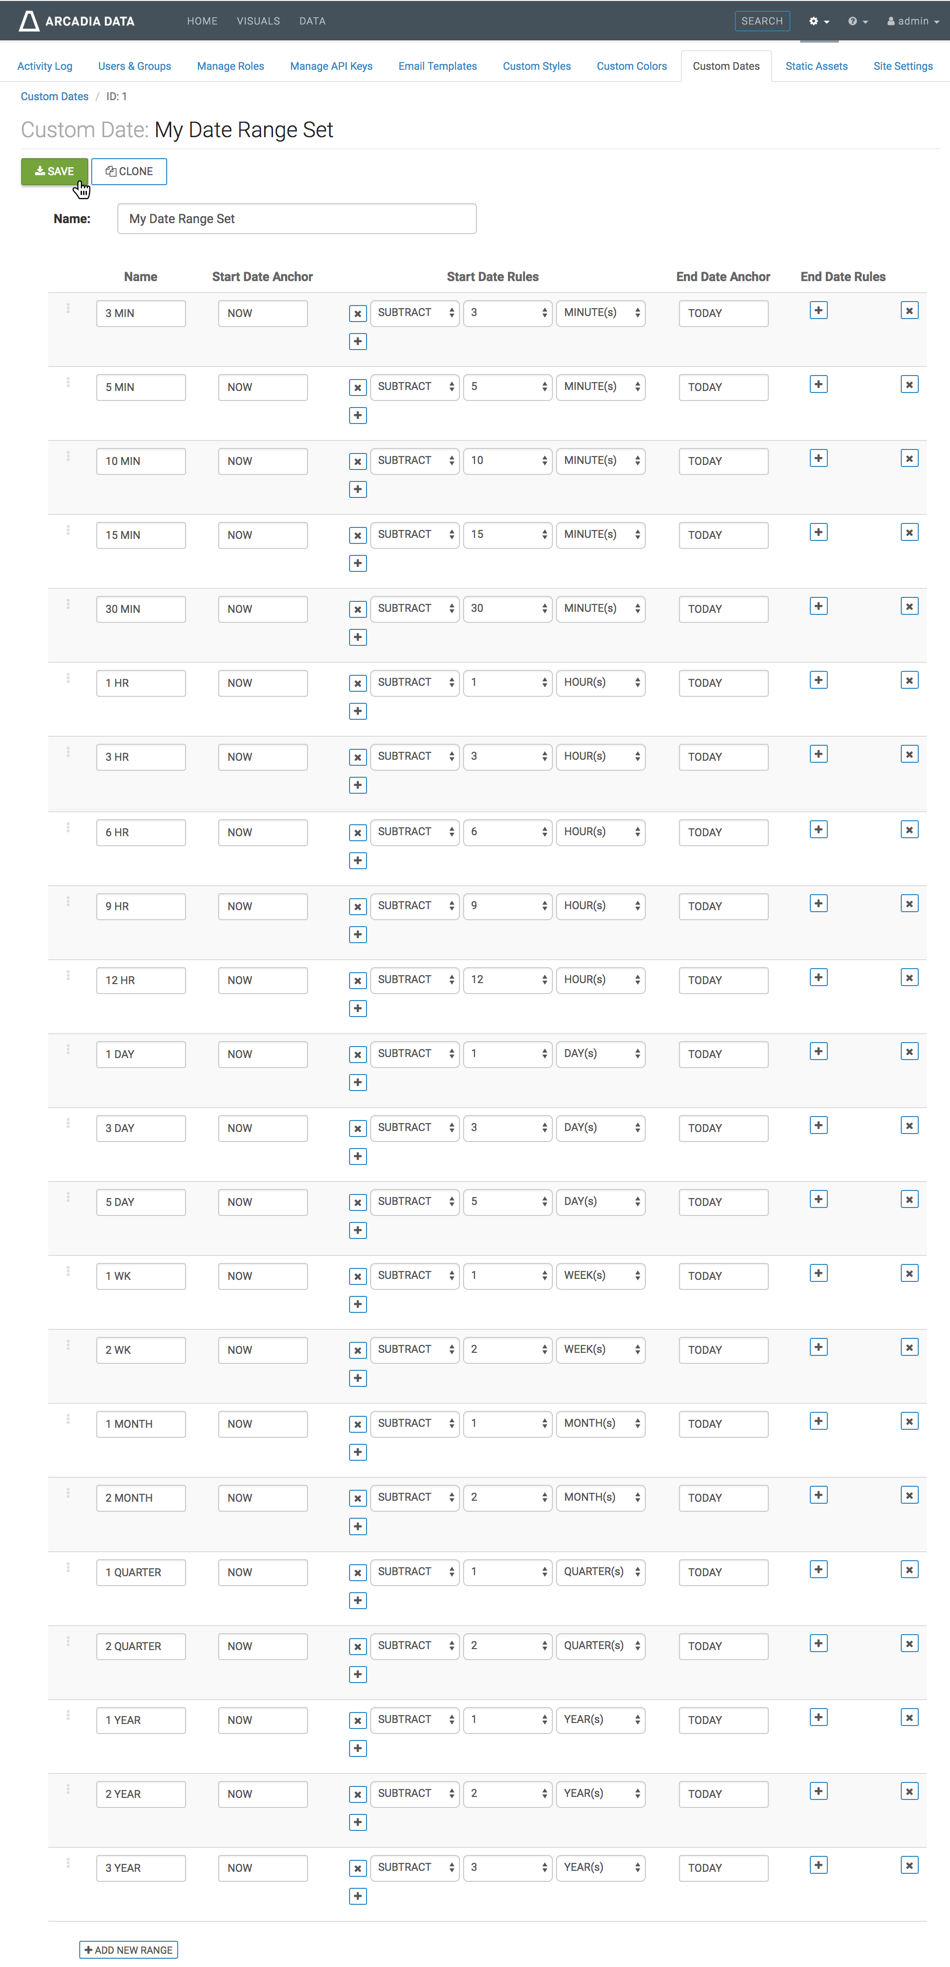
Click Save tat the top of the interface to save the first date range.
Notice that the ID of the set appears at the top of the interface.
-
To create another custom date range, click Add New Range.
Following the earlier steps, create additional dateranges.
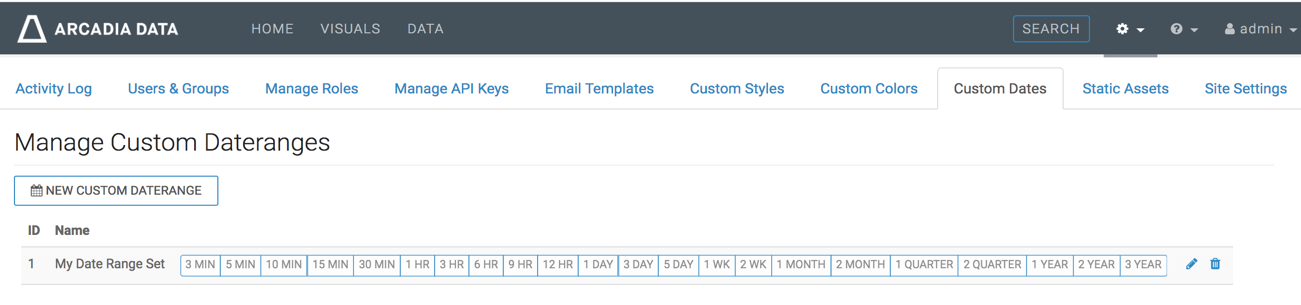
We created the following dateranges in addition to the 3 min: 5 min, 10 min, 15 min, 30 min, 1 hr, 3 hr, 6 hr, 9 hr, 12 hr, 1 day, 3 day, 5 day, 1 wk, 2 wk, 1 month, 2 month, 1 quarter, 2 quarter, 1 year, 2 year, 3 year.
Click Save.
-
Click Custom Dates at the top of the interface.
-
In the Manage Custom Dateranges interface, notice that the list contains the new set, My Date Range Set, with all defined ranges.